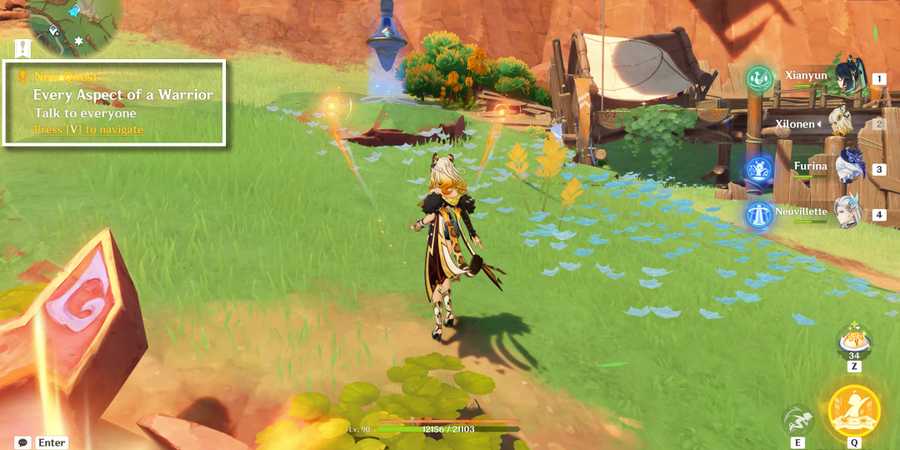
Beneath the Crystal Rock is the first part of a World Quest series in Genshin Impact’s Natlan region. The quest is part of the Shadows of the Mountain chain series that consists of two parts. It will have Genshin Impact players helping an NPC named Titu in the Sulfurous Veins.
The quest is quite lengthy since Travelers need to activate the Stone Pillars around the area. Completing this quest will award pla**yers with some hidden achievements, primogems, and access to a hidden teleportation waypoint.

Genshin Impact: All Saurian Transformations (& What They Do)
Saurians are creatures in Natlan that Genshin Impact players can indwell; knowing what each Saurus does will ease exploration in Natlan.
How To Unlock Beneath The Crystal Rock World Quest in Genshin Impact
Once players have unlocked the Tequemecan Valley region, they can head to an area called Sulfurous Veins. There’s a teleport waypoint right at the entrance and, though it shows it is ‘underground’, it’s not really below ground.
Titu will be standing right behind the waypoint, so just head on over and speak to him to trigger the quest.
Lesser Shadow Pin (1)
Follow the navigation to find the first Shadow Pin that you need to activate. There will be a golden inscription you need to touch to activate it. Before touching the golden inscription, clear the enemies in the area as they will get in the way of it. After you touch the inscription, it will float toward the Shadow Pin and cut to some dialogue with Titu.
Repair The Inscription
After talking to Titu, head to the inscription and interact with the repair button. This will start the first challenge of fixing the Shadow Pins in the area. To repair the inscription, you need to indwell a Tepetlisaurus first. Before you start the challenge, make sure to use the Spiritsconce behind you and change into the Saurian. Then, head on over to the inscription to begin.
Break The Engraved Stone Pillar
In your Tepetlisaurus form, you need to drill into the ground and click the attack button to break all the stone pillars in the area. The Shadow Pin will begin to rotate, so do not worry too much about that, and head around it breaking all the pillars.
There will be a sequence where you’ll have to break stone pillars on the walls above you and the only way to reach them is through the molten fissures on the ground. Enter those and navigate, pressing the attack button when you come in contact with a stone pillar. Do, however, watch out for unstable phlogiston crystals which explode upon contact.
Continue breaking all the stone pillars until the Shadow Pin gauge is full and some enemies appear. You’ll need to defeat the enemies before talking to Titu and heading to the next Lesser Shadow Pin.
Lesser Shadow Pin (2)
Follow the navigation once again to the next Shadow Pin with Titu. This one will be located across the crystal bridge and down a path which is blocked by a destructible rock. Break the rock and head inside to the small cave where the next Shadow Pin is.
There will be a Hilichurl Rogue in front of the golden inscription, so defeat it before continuing on.
Find The Other Inscriptions
Unfortunately, this golden inscription is incomplete and players will need to find the missing parts above. The other inscriptions are scattered in an area south of the Shadow Pin. You’ll need to indwell a Tepetlisaurus again and drill up the walls with the graffiti and wooden planks. Try not to climb up the wall, because not only will it take time, but also drain your stamina.
Search For The Inscription
You’ll eventually reach a small cave with ruins that are inhabited by hilichurls. Get rid of them and then head below to the green area. Use the Spiritsconce and indwell into a Tepetlisaurus again. Since you need to find a way down, the ground will pulse with golden circles. You need to attack these circles with the Tepetlisaurus ability.
Doing so will reward you with a common chest and the ground will open up to reveal the ruins.

Genshin Impact: Jean Envisaged Echoes Guide
Those struggling with Jean's Envisaged Echoes challenge in Genshin Impact can use the guide for tips on how to complete it.
Find A Way To Touch The Inscription
When you enter the ruins, it will be flooded with mini waterfalls that you need to scale. You can either swim or use the Koholasaurus in the area. Using the Saurian will be much quicker and once you follow the navigation, you’ll end up in a pool of water with the golden inscription floating in the middle.
Unfortunately, when you head towards the inscription the water level will rise, sinking it beneath you. You need to find a way to lower the water and you can do that by touching the switch near some hilichurls. They will be through a doorway located behind you. Take out the hilichurls and then operate the switch to lower the water.
Next, swim across the cavern to find some unstable phlogiston crystals that can be used to create a small explosion. Use the Koholasaurus’s ability to break the rocks and drain the entire pool. Do note that it seems like the water basin drains by just breaking the rocks and doesn’t require any interaction with the switch.
Ride The Spiritways
Go back to the inscription and touch it. Once it flies off, head in the same direction and indwell a Koholasaurus to ride the Spiritways to the Shadow Pin. Players can receive a Precious Chest at the end, which not only holds  Primogems but also a Red Metal Key.
Break The Engraved Stone Pillar
Once you have followed the inscription back to the main cave, interact with it to begin the sealing ritual. Much like before, you need to indwell a Tepetlisaurus and use its drilling ability to break all the stones. The challenge is a little trickier here since now the ground will begin to shift and become unstable. Move as fast as you can and watch out for the shifting earth beneath you.
Lesser Shadow Pin (3)
The final Shadow Pin is located south of the teleport waypoint, which is in the middle of Sulfurous Veins. You can teleport there and glide down to find it. Follow the quest navigation and investigate the area beneath the canyon. There will be some dialogue before you’ll have to fight some enemies.
After getting rid of them, the Shadow Pin will fall into the earth and create a massive hole. This marks the end of the Beneath the Crystal Rock quest and will award players with the achievement: Okay, No More Corny Jokes…
Peace To The Slumbering Quest - Genshin Impact
Peace to the Slumbering is the second part of the Shadows of the Mountain quest and requires the quest, Beneath the Crystal Rock, to be completed first. After you converse with Titu, you need to head down into the hole in front of you to investigate it. Keep going all the way down until you see an inscription and interact with it to open up the path.
Follow Titu to the tombstone and share a small dialogue scene with him. Once you’re out of it, unlock the teleportation waypoint beside you and head toward the navigation point with the massive pillar and frozen warriors. The crystals will begin to shift, so just keep running ahead and try not to fall below.
Find The Inscription Fragments
The inscription fragments will be encased in violet mist and will be on top of the crystals. The first one will be right in front of you but beware of the enemies that will immediately spawn the moment you get close to it. You need to attack the crystals to retrieve and once you have obtained the first inscription fragment, head to the next one.
There is no particular order in which you have to collect them, as players only need to follow the navigation. Just keep in mind that from the first one, obtaining each inscription gets progressively harder as the crystals begin to shift randomly. They will rise and fall within seconds, dragging you down with them. You need to wait patiently for each crystal platform to move up and down, bringing you to a decent height.

Genshin Impact Lore: What We Know So Far About The Primordial One
The Primordial One is the most elusive figure in Genshin Impact and here's everything players know so far about this deity.
If you fall, simply follow the steps upwards with the shifting pillars to reach where you need to be. When obtaining the third inscription fragment, head to the crystal from the left side. You need to wait for the pillar to shift and carry you upwards to it. Obtaining the fourth inscription requires some fighting again and once you’re done, it’ll be in the middle.
The fifth inscription fragment is a little trickier because the crystals will surround you and trap you in this shifting maze. Try not to fall in between the gaps and if you do, quickly glide to another platform. Players need to follow their Saurian out of this maze as he will be the only one able to help you right now with the path. Once you are out and have obtained the final inscription fragment, you’ll be back where you started near the golden statues. You will need to touch the middle pillar after the dialogue and defeat the soldiers: Zephaniah and Irizar.
After defeating them, a short cutscene will play out and you’ll need to speak to Titu again to complete the quest. Upon completion, you will receive a Luxurious Chest, an Iridescent Inscription Fragment, and the achievement: Ancestral Reminiscence.

Genshin Impact
- Released
- September 28, 2020
- ESRB
- Teen / Alcohol Reference, Fantasy Violence, In-Game Purchases (Includes Random Items), Users Interact
- Developer(s)
- HoYoverse (Formerly miHoYo)
- Publisher(s)
- HoYoverse (Formerly miHoYo)
- Engine
- Unity
- Multiplayer
- Online Co-Op
- Cross-Platform Play
- All platforms
- Cross Save
- All platforms
- Platform(s)
- PlayStation 5, PlayStation 4, Xbox Series X, Xbox Series S, PC, iOS, Android
- Genre(s)
- RPG, Action, Adventure, Gacha, Open-World


